Explore how unified SASE architecture can revolutionise network infrastructure, delivering on the promise of enhanced security, streamlined operations, and accelerated deployments.
It’s well documented and proven that 2FA (2 Factor Authentication) greatly mitigates account compromises, so I won’t go into detail on why you should use 2FA other than you should. The vBridge FortiGate vDOM service offers FortiTokens for 2FA which works well, but requires you to purchase FortiTokens for your users and install the FortiToken App and in a world of 2FA Apps, one less authenticator app the better if you ask me. Other benefits to adding FortiGate Azure SSO are
1. Centralized Credentials – more secure, better user experience, saves time. No more username/passwords spread across different platforms.
2. Using Azure SSO with SAML removes the need for Radius or NPS server with past FortiGate LDAP designs, one less point of failure.
3. MS Authenticator App – push notifications with number verification, Microsoft will continue to support and improve security as cybersecurity is ever changing.
4. Lost phone easy to restore- a major pain point with some OTP's app's is no cloud backups of OTP codes, if you lose your phone you are dead in the water. The MS authenticator can be backed up to the cloud and restored easily.
5. Tick box's with Security Compliance Audits - ISO 27001, PCI DSS etc.
6. Better control of contactor access - Using Azure AD Security Groups you can create a group for external access then create a matching FortiGate SSO (eg contractor-sso) user with FortiGate rules to restrict access into your environment.
Below I will guide you through the process of configuring both Azure and FortiGate for SAML Authentication, note that it requires a publicly signed certificate and at minimum Azure Business Premium.
Note, this blog is more complex than others, but everything can be done in parallel with your existing Azure and FortiGate configuration, once you have tested the configuration you should be able to cutover seamlessly as you can create a new rule permitting the traffic with Azure SSO group as the defined as the source Users.
Azure Setup
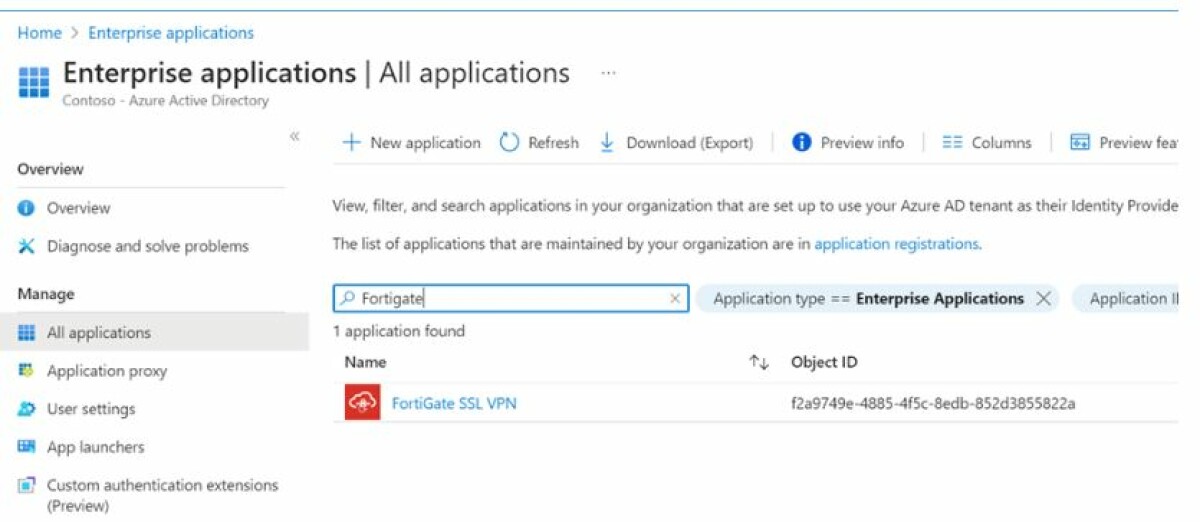
In the Azure portal search/go to for “Enterprise Applications” then search for “FortiGate” which should show “FortiGate SSL VPN”
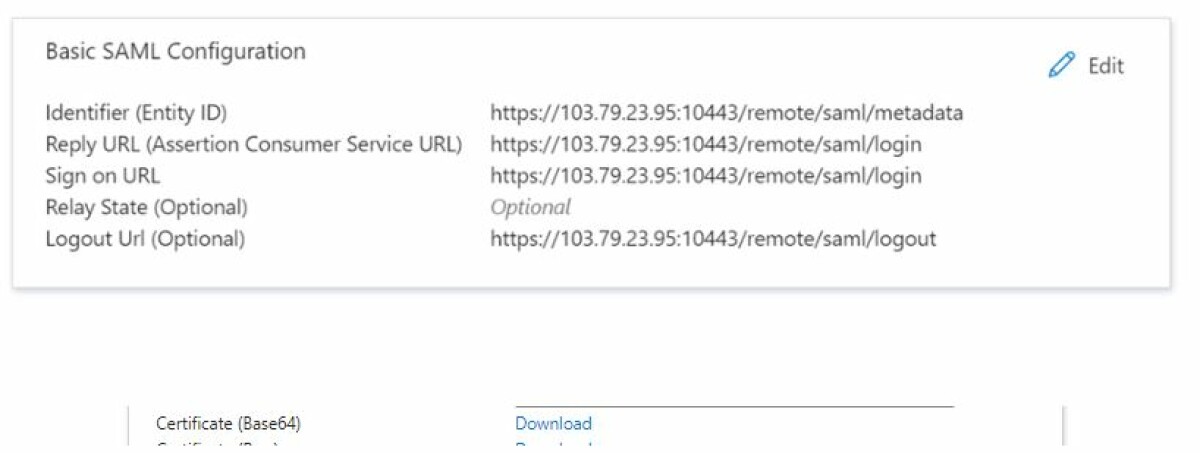
2. Once in FortiGate SSL VPN to go “2. Set up single sign on”, sign on method “SAML”. Next, we will need to enter the Base SAML Configuration. Below shows my lab demo which has an IP but in production you would use the public DNS entire eg Entity ID = https://remote.companyname.co.nz/remote/saml/metadata
Note that only Identifier, Reply, Sign On URL and Logout URL are required and if you use port 10443 you will need to add it to the URL. Finally download the “Certificate (Base 64)” certificate under SAML Signing Certificate.
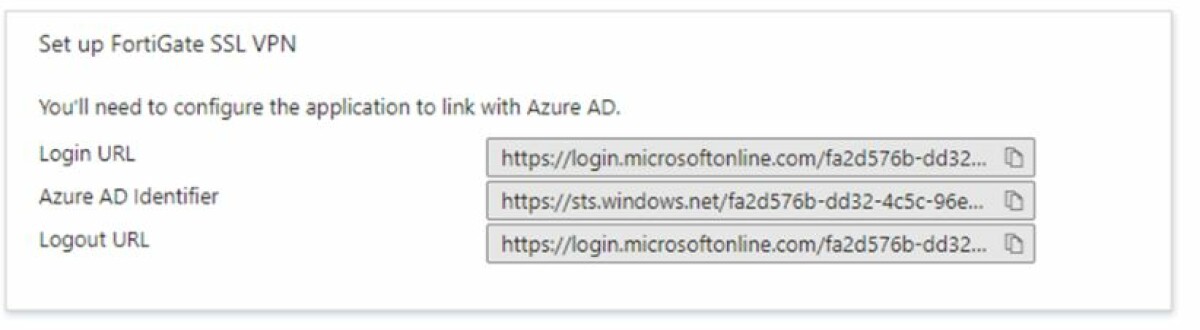
3. Next, get the URL’s for the FortiGate under “Setup FortigGate SSL VPN”, you will need to copy to notepad the Login URL, Azure AD Identifier and Logout URL, note that login and logout URL are the same.
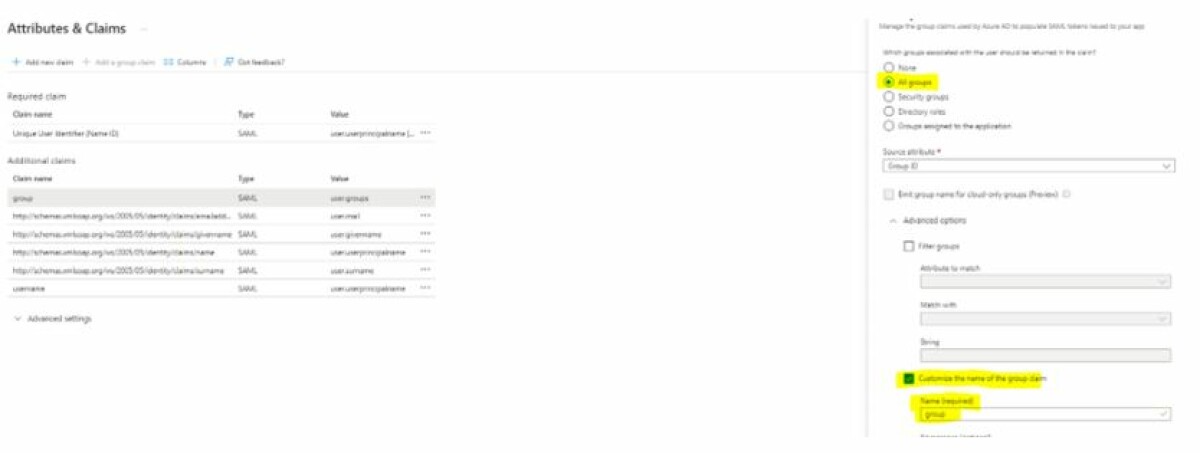
4. Under “Attributes and Claims click on “Add new Claim” Name* = username and Source Attribute = user.userprincipalname and set the Group Claim to “All Groups” and Customize the name of the group claim to name = group
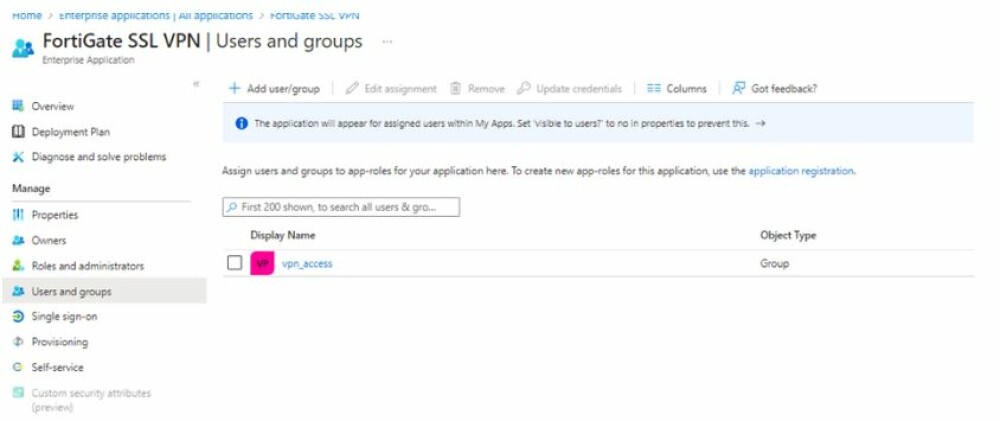
5. We will need to allow the users to use the FortiGate SSL VPN applications. Under Enterprise Applications > FortiGate SSL VPN, on the left-hand side select “Users and Groups” , Add Users and Groups and add the Group you are wanting to use the SSL VPN, note do not use a group with a nested groups.
FortiGate Setup
1. Import the Azure Remote certificate from Azure Configuration step 2 under System > Certificate > Create/Import > Remote Certificate > Upload Cert.
2. You will need to do the FortiGate SSO configuration in the CLI, as the GUI is missing fields, below shows an example configuration.
config user saml
edit "azure-sso"
set cert "your_signed_cert" (Not the Azure remote cert)
set entity-id "https://example.remote.companyname.co.nz/remote/saml/metadata"
set single-sign-on-url "https://remote.companyname.co.nz /remote/saml/login"
set single-logout-url "https://remote.companyname.co.nz /remote/saml/logout"
set idp-entity-id "https://sts.windows.net/fa2d576b-....6c9ef2/"
set idp-single-sign-on-url "https://login.microsoftonline.com/fa2d......6c9ef2/saml2"
set idp-single-logout-url "https://login.microsoftonline.com/fa2d.....6c9ef2/saml2"
set idp-cert "REMOTE_Cert_1" (Azure Remote cert)
set user-name "username"
set group-name "group"
set digest-method sha1
next
end
Notes
- The “set cert” will be the name of the signed certificate that you have on your vDOM, eg remote.companyname.co.nz
- The ipd’s URLs will be the URL’s copied in the Azure configuration step 3 and idp-cert will be the name of the Azure remote cert you uploaded in step 2.
- The entity and single-sign-on and logout are the URL from step 2 in the Azure configuration.
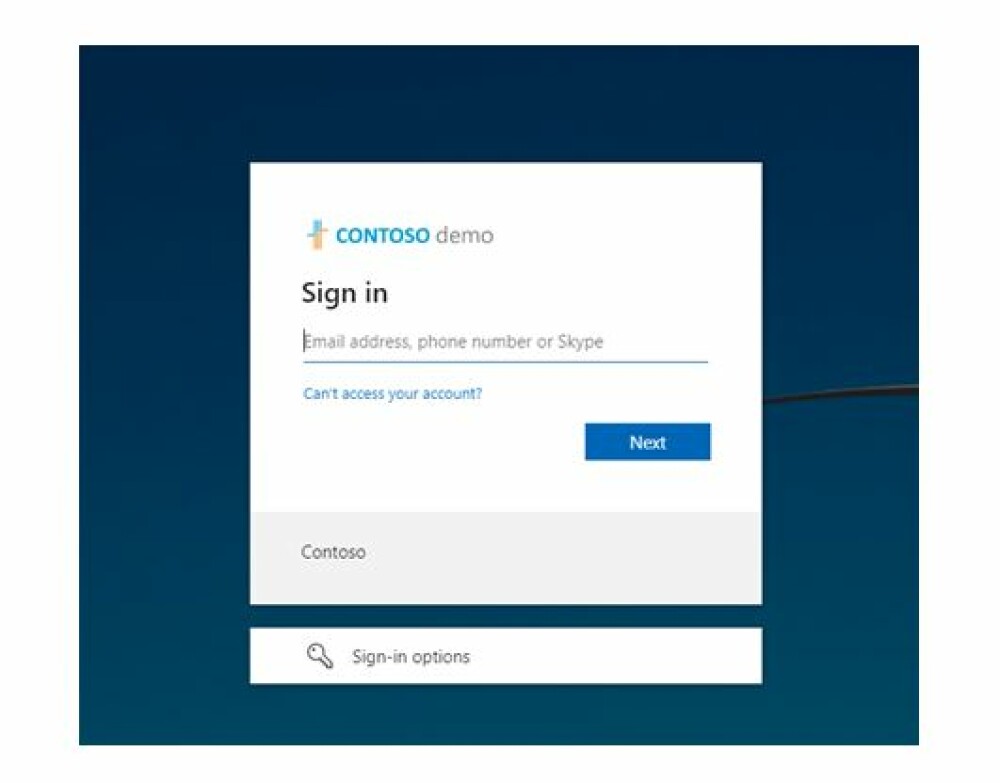
3. We need to create a rule that uses the SSO group, so create a rule that allows “azure-sso” access. I have created a group named “vpn_access” and added the “azure” SSO object. Then I have created a new rules permitting the vpn_access group to the Trusted zone, I have put "All" but you may want to restrict access for VPN users. Note you need to create a new rule for to use the SAML Auth, you can not add the SAML auth group into an existing Firewall rule.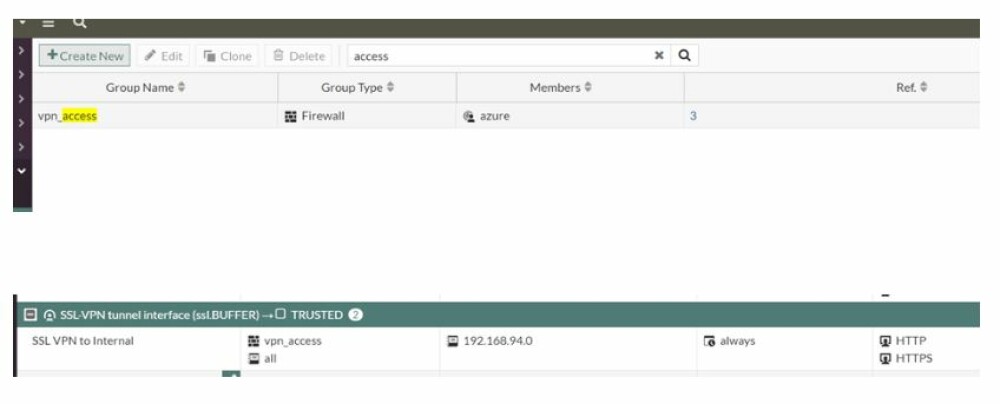 You should be now able to test the configuration, you should notice that the “Single Sign-On” box appears, if you click on this it should take you to the Azure web portal to authenticate. If you get an error message, take note and debug the configuration. To enable the SSO on the existing SSL VPN rules, just add the SSO object to the source user. Also you will need to enable SSO on the FortiClient VPN Agent for tunnel mode.

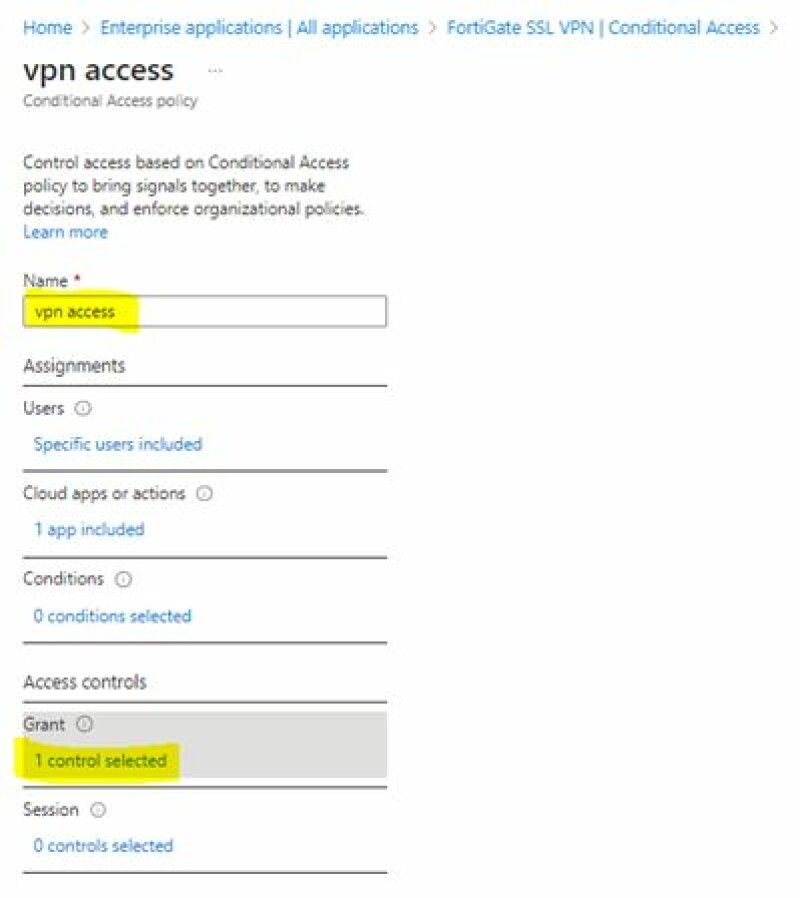
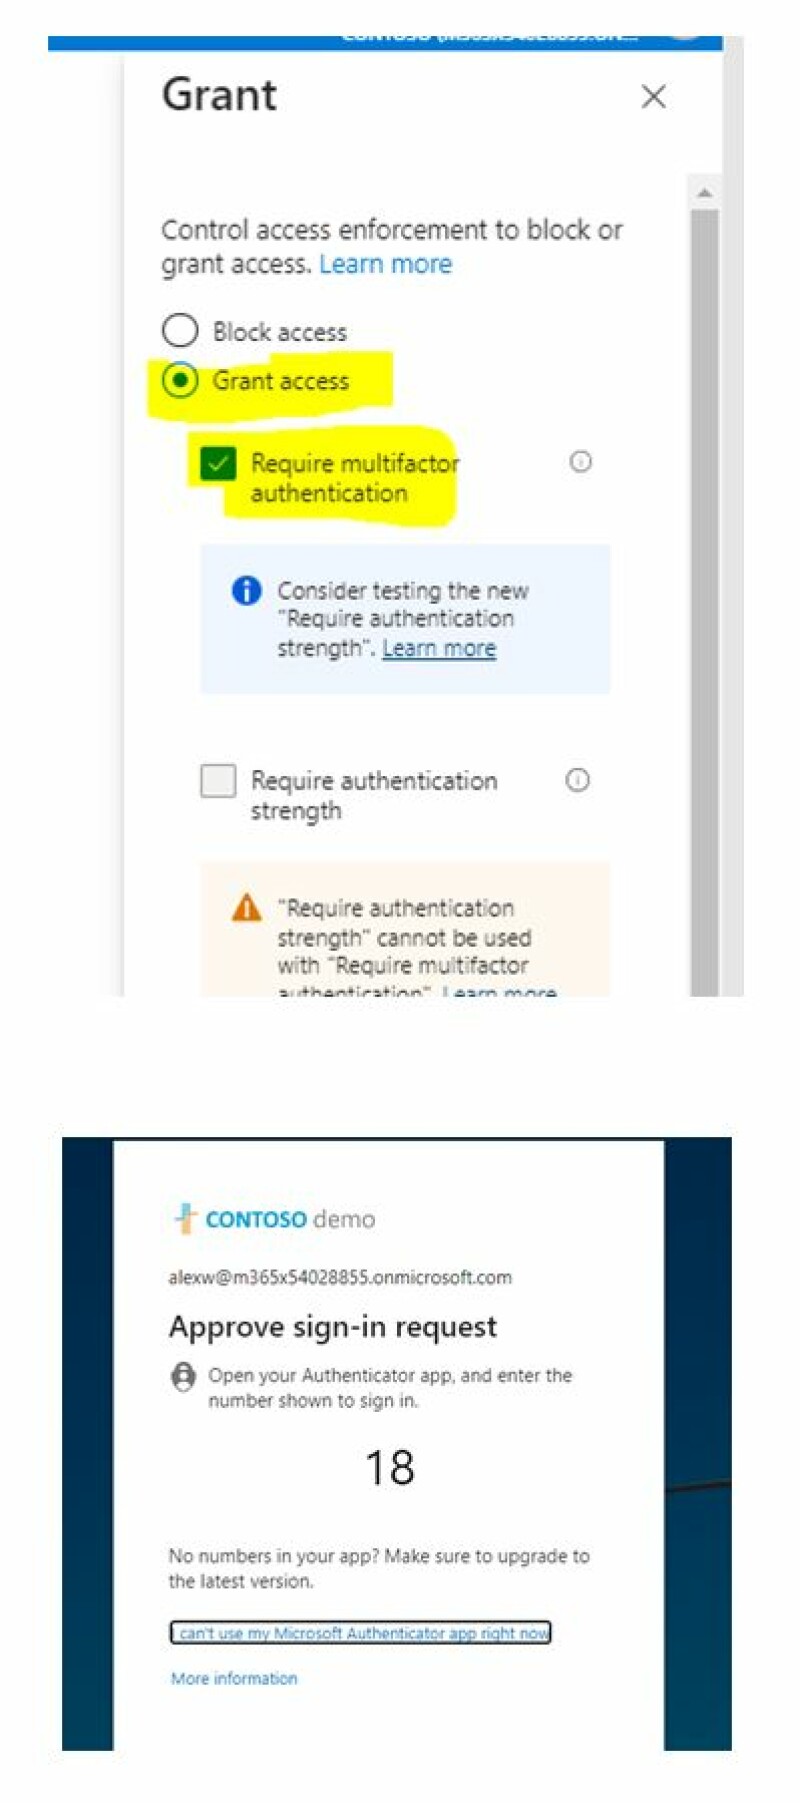
Once you have successfully logged in via SSO, you can enable 2FA by going to “Enterprise Applications > FortiGate SSL VPN > Conditional Access > Create New Policy > Give a name then under “Access Control > Grant > Grant Access and tick “Require multifactor authentication“
MATT FORD
May 2023